Enchanted Witch’s Brew Brownies
Last October, our neighborhood hosted a block-long Halloween festival, the kind where kids parade in costumes, pumpkins glow on porches, and every house competes for the creepiest snack table. I was determined to bring something that felt as magical as it looked, but also simple enough to pull off while juggling school drop-offs and soccer practice. That’s how Witch’s Brew Brownies became my secret weapon.
I can still picture the long table lined with candy corn, caramel apples, and bowls of neon punch. My platter of swirled green-and-purple brownies sat in the middle like a bubbling potion, and within minutes, little witches, vampires, and superheroes had swarmed around it. Some kids grabbed them because of the colors, others came back for seconds because of the deep chocolate flavor. Even the adults who claim to “just be here for the kids” couldn’t resist sneaking one.
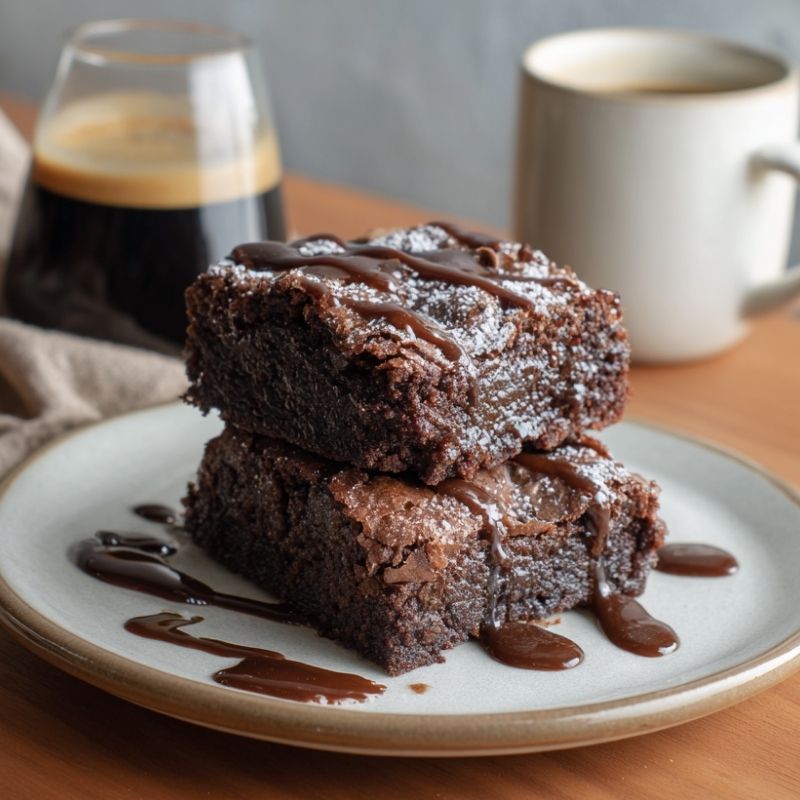
The marbled swirl looks like something straight from a cauldron, yet the base is a rich, fudgy brownie you’d happily eat any time of year. With a few drops of food coloring and some sprinkles, you get a dessert that transforms an ordinary pan of brownies into a party centerpiece.
Halloween might only come once a year, but trust me, once you make these brownies, you’ll want to find excuses to swirl batter in bold colors all year round.
Short Description
Rich, fudgy brownies swirled with green and purple food coloring for a spooky, marbled effect. These Witch’s Brew Brownies are easy to make, fun to decorate, and perfect for Halloween parties.
Key Ingredients
- 1 cup unsalted butter, melted
- 2 cups granulated sugar
- 4 large eggs
- 1 teaspoon vanilla extract
- 1 cup all-purpose flour
- 1 cup unsweetened cocoa powder
- ½ teaspoon salt
- ½ teaspoon baking powder
- ½ cup dark chocolate chips
- Green food coloring
- Purple food coloring
- Halloween-themed sprinkles (optional)
Tools Needed
- 9×13-inch baking pan
- Parchment paper
- Two mixing bowls
- Whisk or electric mixer
- Spatula
- Toothpick or knife for swirling
- Measuring cups and spoons
Cooking Instructions
Step 1: Preheat the Oven
Preheat oven to 350°F (175°C). Line a 9×13-inch pan with parchment paper, leaving some overhang for easy removal.
Step 2: Mix Wet Ingredients
In a large bowl, whisk together melted butter and sugar until smooth. Add eggs one at a time, whisking after each addition, then stir in vanilla extract.
Step 3: Combine Dry Ingredients
In a separate bowl, sift flour, cocoa powder, salt, and baking powder. Gently fold this mixture into the wet ingredients until just combined. Avoid overmixing—the batter should be thick and glossy.
Step 4: Add Chocolate Chips
Fold in dark chocolate chips to give extra bursts of chocolate in every bite.
Step 5: Divide and Color
Split the batter evenly into two bowls. Tint one portion green and the other purple with food coloring, adjusting until you get vibrant hues.
Step 6: Create the Swirl
Spoon alternating dollops of each batter into the prepared pan. Drag a toothpick or knife through the layers to create a marbled effect that looks like a witch’s brew.
Step 7: Bake
Bake for 25–30 minutes, or until a toothpick inserted into the center comes out with only a few moist crumbs. The edges should look set while the center remains slightly soft.
Step 8: Cool and Decorate
Let the brownies cool completely in the pan before slicing. Add Halloween sprinkles on top if you’d like extra festive flair.
Troubleshooting Tip: If your swirl looks muddy instead of marbled, stop dragging the toothpick earlier. Less swirling makes for sharper, more dramatic colors.
Why You’ll Love This Recipe
Spooky & Fun: Perfect for Halloween parties and kid-friendly gatherings.
Rich Chocolate Flavor: Classic fudgy brownies with a festive twist.
Customizable Colors: Swap in orange and black for different Halloween vibes.
Easy Prep: Comes together in under 20 minutes before baking.
Crowd Pleaser: Loved by kids and adults alike.
Mistakes to Avoid & Solutions
Overmixing the batter: This leads to dense, tough brownies. Solution: Mix only until ingredients are combined.
Using too much food coloring: Can affect flavor. Solution: Start small, add a drop at a time.
Baking too long: Results in dry brownies. Solution: Check with a toothpick early, aim for moist crumbs, not a clean stick.
Skipping parchment paper: Makes brownies hard to remove. Solution: Always line the pan with parchment.
Swirling too aggressively: Colors can blend into a brown mess. Solution: Light, gentle swirls with a toothpick.
Serving and Pairing Suggestions
Serve cut into small squares on a Halloween-themed platter.
Pair with hot cocoa topped with whipped cream for cozy fall vibes.
For adults, serve alongside mulled wine or spiced cider.
Add a scoop of vanilla or pumpkin ice cream for a decadent dessert.
Perfect as a sweet treat for school bake sales or neighborhood gatherings.
Storage and Reheating Tips
Store leftovers in an airtight container at room temperature for up to 3 days.
Refrigerate for up to 5 days if you prefer firmer brownies.
Freeze individually wrapped brownies for up to 2 months. Thaw overnight in the fridge.
Reheat briefly in the microwave (10–15 seconds) for a warm, gooey texture.
FAQs
1. Can I use boxed brownie mix instead of homemade batter?
Yes, but the flavor won’t be as rich. Follow the box instructions, then divide and color the batter as directed.
2. Do I need gel food coloring, or will liquid work?
Gel works best for bold, vibrant colors without thinning the batter.
3. What if I don’t have dark chocolate chips?
You can use milk or semi-sweet chocolate chips, though the brownies will be a bit sweeter.
4. How do I know when they’re done baking?
Insert a toothpick in the center—look for a few moist crumbs, not raw batter.
5. Can I make these brownies ahead of time?
Yes! Bake the night before, cool completely, and store covered until serving.
Tips & Tricks
Use a serrated knife for clean slices.
Chill brownies before cutting for sharper edges.
Add edible candy eyeballs on top for extra spooky fun.
Double the recipe if baking for a crowd.
Warm slightly before serving for the richest flavor.
Recipe Variations
Pumpkin Patch Brownies: Add ½ cup pumpkin puree and 1 teaspoon pumpkin spice to the batter, swirling orange instead of purple.
Midnight Brownies: Use black food coloring for one half of the batter and neon green for the other for a darker, dramatic look.
Mint Witch’s Brew: Stir ½ teaspoon peppermint extract into the batter and swirl with green and white for a refreshing twist.
Candy-Crush Brownies: Fold in chopped Halloween candies instead of chocolate chips for bursts of different flavors.
Gluten-Free Version: Swap all-purpose flour for a 1:1 gluten-free flour blend.
Final Thoughts
Every Halloween has its traditions, but for me, these brownies feel like the treat that brings the celebration together. They’re colorful enough to catch a child’s eye, decadent enough to make adults linger near the dessert table, and simple enough to fit into an already packed holiday week. I love how a swirl of batter can spark so much excitement and instantly set the mood for a festive evening.
Whenever I pull them out of the oven, my kitchen fills with that familiar chocolate aroma, but it’s the swirl that always makes me smile—it’s like stirring up a little magic in my own cauldron.
Enchanted Witch’s Brew Brownies
Course: DessertDifficulty: Easy16
servings20
minutes30
minutesRich, fudgy brownies swirled with green and purple food coloring for a spooky, marbled effect. These Witch’s Brew Brownies are easy to make, fun to decorate, and perfect for Halloween parties.
Ingredients
1 cup unsalted butter, melted
2 cups granulated sugar
4 large eggs
1 teaspoon vanilla extract
1 cup all-purpose flour
1 cup unsweetened cocoa powder
½ teaspoon salt
½ teaspoon baking powder
½ cup dark chocolate chips
Green food coloring
Purple food coloring
Halloween-themed sprinkles (optional)
Directions
- Preheat oven to 350°F (175°C) and line a 9×13-inch pan with parchment paper, leaving some overhang for easy removal.
- In a large bowl, whisk melted butter and sugar until smooth. Add eggs one at a time, whisking after each addition, then stir in vanilla.
- In another bowl, sift flour, cocoa powder, salt, and baking powder. Gently fold into the wet mixture until just combined. The batter should be thick and glossy.
- Fold in dark chocolate chips for extra bursts of flavor.
- Divide batter evenly into two bowls. Tint one green and the other purple with food coloring until vibrant.
- Spoon alternating dollops of each batter into the pan, then drag a toothpick or knife through to create a marbled swirl.
- Bake for 25–30 minutes, until a toothpick inserted in the center comes out with a few moist crumbs. The edges should look set while the center stays slightly soft.
- Cool completely in the pan before slicing. Add Halloween sprinkles on top if desired.
