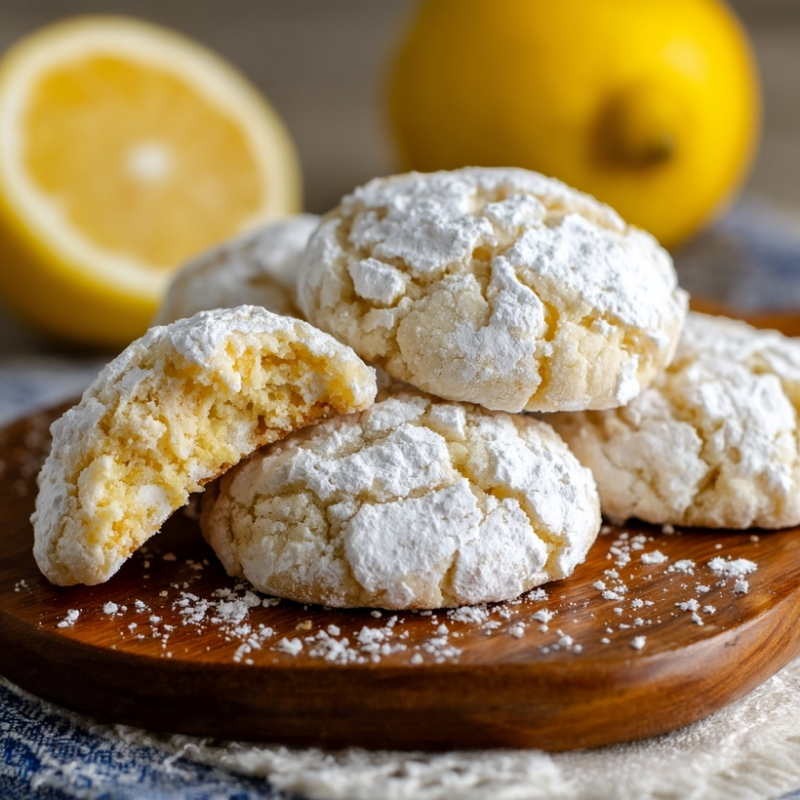
Dreamy Pink Velvet Cake
The school hallway buzzed with last-minute energy as parents shuffled in with trays and boxes, each one trying to outdo the other without saying it out loud. My middle child had signed me up for the bake sale without asking, and I found out the night before. Not ideal, but also not unusual in this house.
By morning, I stood in the kitchen with flour on my sleeve and a quiet determination to make something that felt a little special. Not complicated, just thoughtful. Something soft, a little nostalgic, but still bright enough to stand out on a crowded table.
Pink velvet came to mind, not the bold kind that feels overdone, but a softer shade. Gentle, almost playful. The kind of cake that catches your eye without shouting for attention. I kept the texture tender, the flavor balanced, and leaned on a cream cheese frosting that never fails.
When we arrived, the table was already packed. Chocolate, vanilla, sprinkles everywhere. Then this cake, sitting quietly in the middle, drew people in one slice at a time. By the end, only crumbs remained, and my kid gave me that look that said, “You saved me.” That was enough.
Short Description
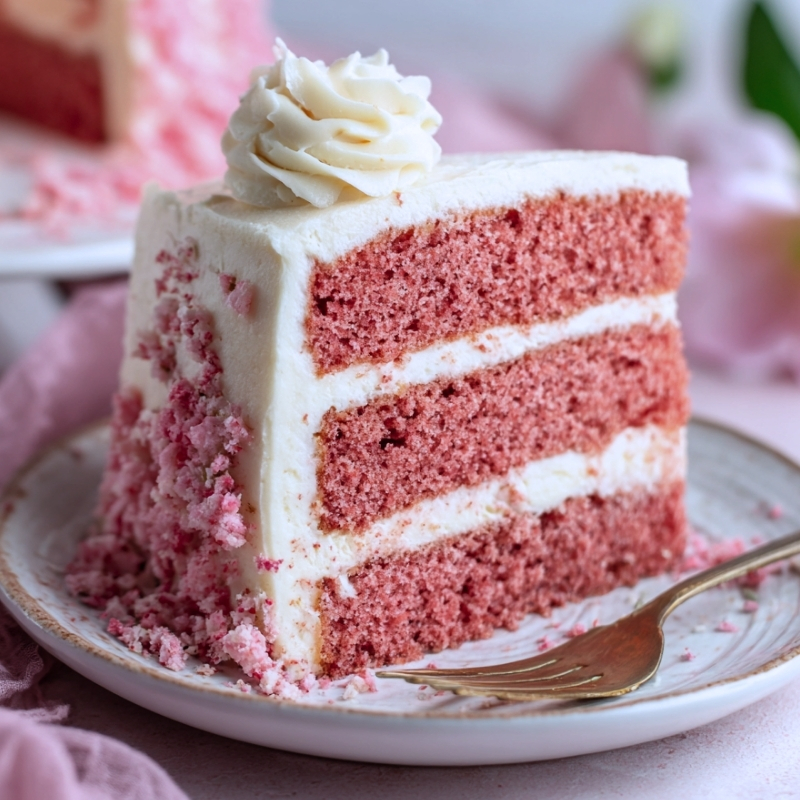
A soft and tender pink velvet cake layered with creamy, tangy cream cheese frosting. Light cocoa notes, a delicate crumb, and a beautiful blush color make it perfect for celebrations or simple moments that call for something sweet.
Key Ingredients
- For the cake batter
- 2 ½ cups cake flour, sifted
- 1 tablespoon unsweetened cocoa powder
- 1 teaspoon baking soda
- ½ teaspoon salt
- ¾ cup unsalted butter, softened
- 1 ¾ cups granulated sugar
- 2 large eggs, room temperature
- 1 teaspoon vanilla extract
- 1 cup buttermilk
- Pink gel food coloring, as needed
- 1 teaspoon white vinegar
- For the cream cheese frosting
- 8 ounces cream cheese, softened
- ½ cup unsalted butter, softened
- 3 to 4 cups powdered sugar, sifted
- 1 teaspoon vanilla extract
- For garnish
- Fresh berries, edible flowers, or sprinkles
Tools Needed
- Two 8 inch round cake pans
- Electric mixer
- Mixing bowls
- Whisk
- Rubber spatula
- Cooling rack
- Serrated knife
- Offset spatula
Cooking Instructions
Step 1: Prepare the Workspace (Preheat and Pan Setup)
Preheat the oven to 350°F (175°C). Grease and flour two 8 inch round cake pans or line with parchment circles and grease lightly. This helps the cakes release cleanly after baking.
Step 2: Mix the Dry Ingredients (Light and Even Base)
In a medium bowl, whisk together the sifted cake flour, cocoa powder, baking soda, and salt. Sifting removes lumps and keeps the texture soft.
Step 3: Cream Butter and Sugar (Build Structure)
In a large bowl, beat the softened butter and sugar on medium high speed for 3 to 5 minutes until pale and fluffy. This step adds air, which helps the cake rise properly.
Step 4: Add Eggs and Vanilla (Smooth Batter)
Beat in the eggs one at a time, mixing well after each addition. Scrape down the bowl as needed. Stir in the vanilla extract until combined.
Step 5: Combine Buttermilk and Color (Signature Look)
In a separate bowl, whisk the buttermilk with pink gel food coloring. Adjust the color gradually until you reach your desired shade.
Step 6: Alternate Wet and Dry (Gentle Mixing)
With the mixer on low speed, add the dry ingredients in three parts, alternating with the buttermilk mixture in two parts. Start and end with the dry ingredients. Mix just until combined to avoid a dense cake.
Step 7: Add Vinegar (Lift and Texture)
Stir the vinegar into the batter and gently fold for 10 to 15 seconds. You may notice a slight fizz, which helps create a lighter crumb.
Step 8: Bake the Layers (Even Baking)
Divide the batter evenly between the pans. Bake for 28 to 32 minutes, or until a toothpick inserted in the center comes out clean. The tops should spring back lightly when touched.
Step 9: Cool Completely (Prevent Melting Frosting)
Let the cakes cool in the pans for 10 to 15 minutes, then transfer to a wire rack. Allow them to cool completely before frosting.
Step 10: Make the Frosting (Creamy Finish)
Beat the cream cheese and butter until smooth. Add powdered sugar gradually, mixing on low, then increase speed until fluffy. Stir in vanilla extract.
Step 11: Assemble and Frost (Layer with Care)
Level the cakes if needed. Place one layer on a serving plate, spread frosting evenly, then add the second layer. Frost the top and sides.
Step 12: Decorate (Final Touch)
Top with berries, edible flowers, or sprinkles. Chill briefly if needed to set the frosting before slicing.
Why You’ll Love This Recipe
Soft and Tender Crumb: The cake flour and careful mixing create a light, delicate texture
Balanced Flavor: A hint of cocoa with tangy cream cheese frosting keeps it from feeling too sweet
Visually Stunning: The soft pink color makes it perfect for celebrations
Make Ahead Friendly: Layers can be baked in advance and assembled later
Crowd Pleaser: Familiar flavors with a fresh twist that appeals to all ages
Mistakes to Avoid & Solutions
Overmixing the Batter: This can lead to a dense cake
Solution: Mix just until ingredients are combined, especially after adding flour
Cold Ingredients: Butter or eggs that are too cold won’t blend smoothly
Solution: Bring ingredients to room temperature before starting
Uneven Cake Layers: Batter distributed unevenly causes lopsided layers
Solution: Use a kitchen scale or measure carefully before baking
Overbaking: Leads to dry texture
Solution: Check at 28 minutes and remove once a toothpick comes out clean
Runny Frosting: Too soft or thin frosting won’t hold shape
Solution: Chill slightly or add more powdered sugar gradually
Serving and Pairing Suggestions
Serve as a celebration cake for birthdays or gatherings
Pair with hot coffee or light tea to balance sweetness
Add fresh strawberries or raspberries on the side
Slice and serve plated for a more elegant presentation
Works well as a centerpiece dessert
Storage and Reheating Tips
Refrigerator: Store in an airtight container for up to 4 days
Bring to Room Temperature: Let slices sit out for 20 to 30 minutes before serving
Avoid Freezing Fully Frosted Cake: Frosting texture may change
Freeze Cake Layers Only: Wrap tightly and freeze up to 2 months
FAQs
1. Can I make this cake without food coloring?
Yes, the cake will have a light natural color and still taste great.
2. What makes velvet cake different from regular cake?
It uses a small amount of cocoa and vinegar for a softer texture and subtle flavor.
3. Can I use all purpose flour instead of cake flour?
Yes, but the texture will be slightly less tender. You can substitute by removing 2 tablespoons per cup and replacing with cornstarch.
4. How do I get even cake layers?
Use a scale to divide batter evenly and rotate pans halfway through baking if needed.
5. Can I make cupcakes with this batter?
Yes, bake at 350°F for about 18 to 22 minutes.
Tips & Tricks
Use gel food coloring for a more vibrant color without thinning the batter
Scrape the bowl often to keep the batter evenly mixed
Chill the cake slightly before slicing for cleaner cuts
Use a serrated knife for leveling layers neatly
Recipe Variations
Strawberry Pink Velvet Cake
Add ¼ cup strawberry puree to the buttermilk mixture. Reduce buttermilk slightly to balance moisture.
Chocolate Pink Velvet Cake
Increase cocoa powder to 2 tablespoons for a richer chocolate flavor.
Layered Berry Version
Spread a thin layer of berry jam between the cake layers before frosting.
Final Thoughts
The last slice disappeared before I had a chance to wrap it up, and honestly, that felt right. Cakes like this aren’t meant to sit around waiting. They bring people in, start conversations, and quietly make a moment feel more complete.
That bake sale table had plenty of options, but this one held its own without trying too hard. Soft, balanced, and just a little unexpected. Back in the kitchen later that evening, I noticed a faint pink crumb on the counter and left it there for a while. A small reminder that something simple, made with care, can carry a lot of weight.
Dreamy Pink Velvet Cake
Course: DessertDifficulty: Easy10
servings25
minutes30
minutes45
minutesA soft and tender pink velvet cake layered with creamy, tangy cream cheese frosting. Light cocoa notes, a delicate crumb, and a beautiful blush color make it perfect for celebrations or simple moments that call for something sweet.
Ingredients
For the cake batter
2 ½ cups cake flour, sifted
1 tablespoon unsweetened cocoa powder
1 teaspoon baking soda
½ teaspoon salt
¾ cup unsalted butter, softened
1 ¾ cups granulated sugar
2 large eggs, room temperature
1 teaspoon vanilla extract
1 cup buttermilk
Pink gel food coloring, as needed
1 teaspoon white vinegar
For the cream cheese frosting
8 ounces cream cheese, softened
½ cup unsalted butter, softened
3 to 4 cups powdered sugar, sifted
1 teaspoon vanilla extract
For garnish
Fresh berries, edible flowers, or sprinkles
Directions
- Preheat the oven to 350°F (175°C). Grease and flour two 8 inch round cake pans or line with parchment and lightly grease to prevent sticking.
- Whisk together the sifted cake flour, cocoa powder, baking soda, and salt in a medium bowl until evenly combined.
- Beat the softened butter and sugar on medium high speed for 3 to 5 minutes until light, pale, and fluffy.
- Add the eggs one at a time, mixing well after each addition. Scrape down the bowl, then stir in the vanilla extract.
- In a separate bowl, whisk the buttermilk with pink gel food coloring, adjusting the color to your preference.
- With the mixer on low speed, add the dry ingredients in three parts, alternating with the buttermilk mixture in two parts. Begin and end with the dry ingredients, mixing just until combined.
- Stir in the vinegar and gently fold for 10 to 15 seconds. A slight fizz is normal and helps create a lighter texture.
- Divide the batter evenly between the pans. Bake for 28 to 32 minutes, until a toothpick inserted in the center comes out clean and the tops spring back lightly.
- Cool the cakes in the pans for 10 to 15 minutes, then transfer to a wire rack and let them cool completely before frosting.
- Beat the cream cheese and butter until smooth. Gradually add powdered sugar, mixing on low, then increase speed until fluffy. Stir in vanilla extract.
- Level the cake layers if needed. Place one layer on a serving plate, spread frosting evenly, then add the second layer and frost the top and sides.
- Finish with berries, edible flowers, or sprinkles. Chill briefly if needed before slicing.