Creamy Peanut Butter Eggs
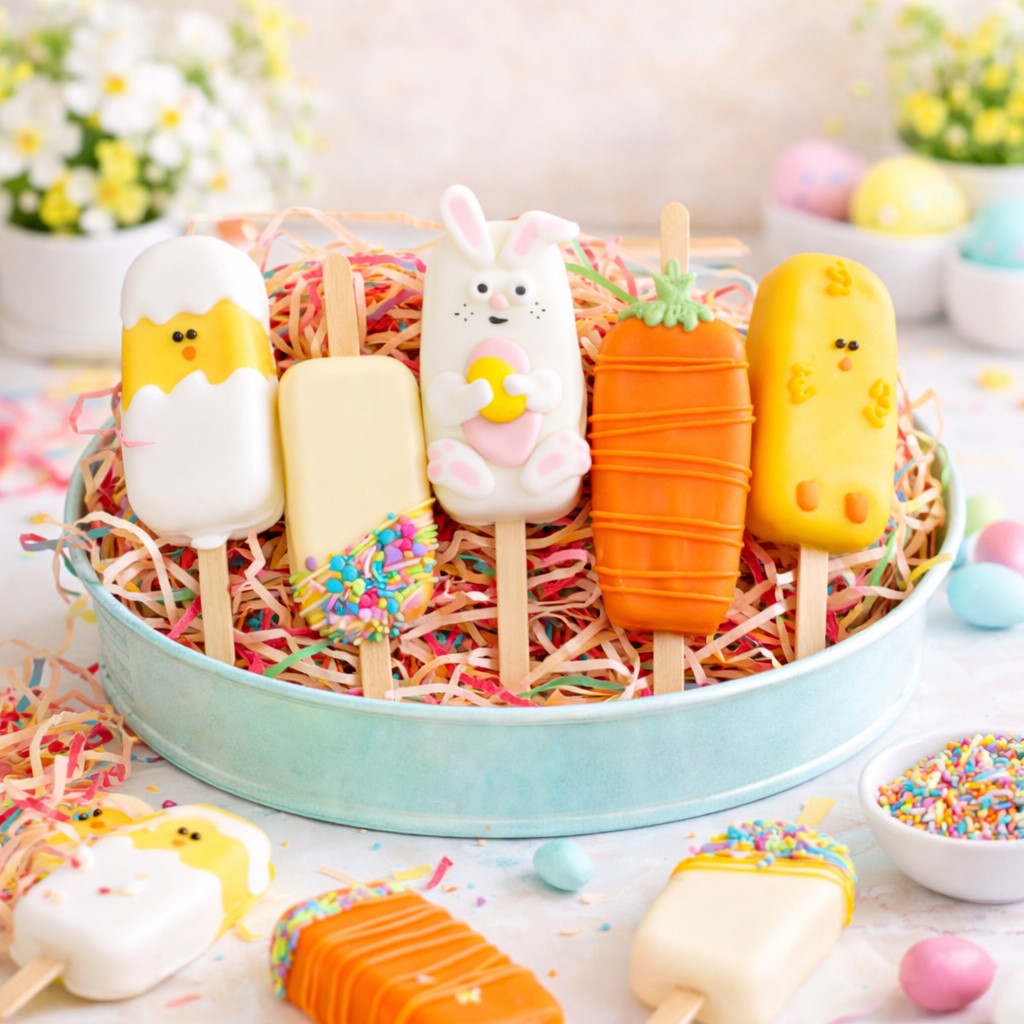
The small spring fair in our neighborhood always comes with pastel decorations, handmade crafts, and tables filled with homemade treats. Children run between booths with painted eggs in their hands, while adults pause to chat under strings of soft lights. I had signed up to bring something homemade, something that would feel playful but still familiar to everyone stopping by.
Back in the kitchen, Peanut Butter Eggs became the center of that preparation, shaped slowly while music played in the background and messages from friends popped in about the event.
The mixture came together creamy and smooth, with a gentle sweetness balanced by that rich peanut flavor. As I pressed each piece into molds, the process felt more like crafting than baking, simple but surprisingly calming.
When the fair opened, trays of decorated eggs sat among colorful displays, catching the attention of both kids and adults. The chocolate coating had just the right snap, giving way to a soft, sweet filling inside.
Between laughter, small conversations, and the soft hum of the afternoon, these little treats blended into the moment, adding a touch of warmth to the celebration.
Short Description
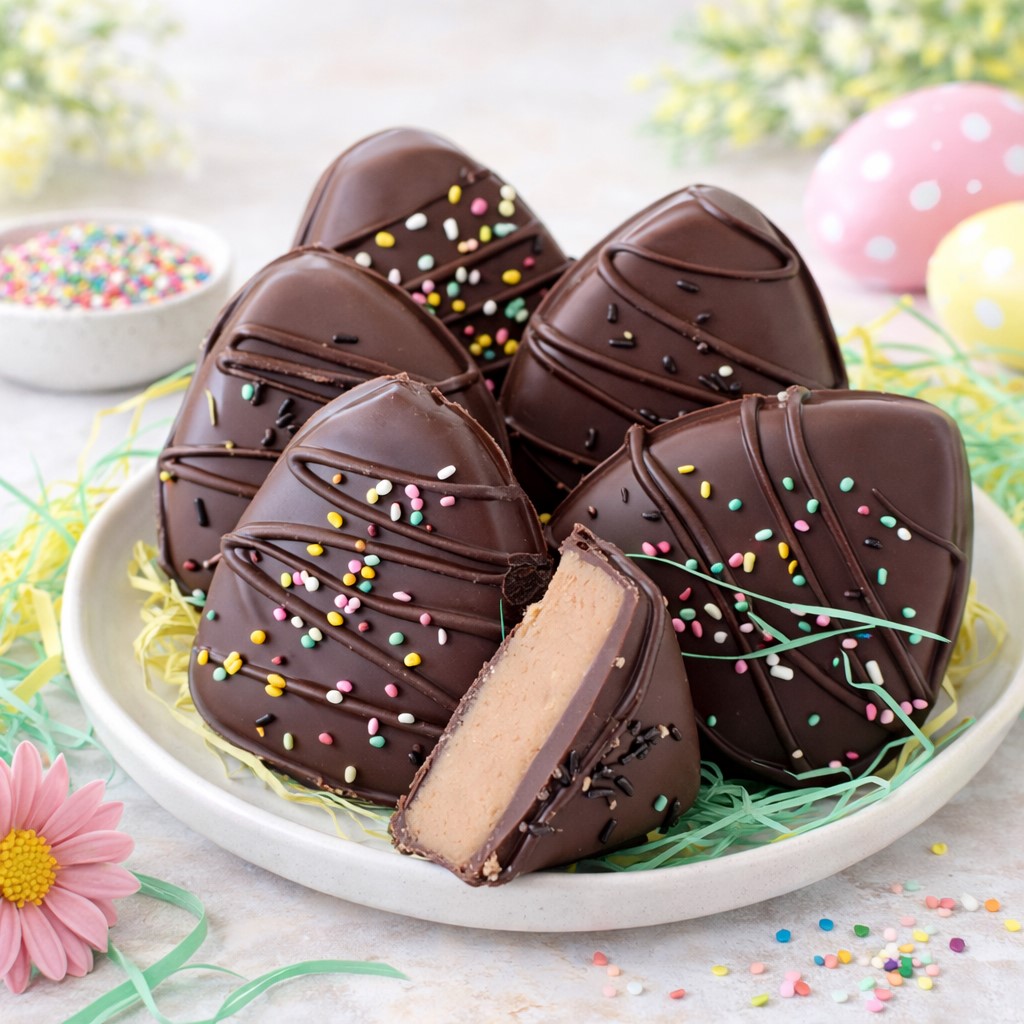
Smooth peanut butter filling coated in rich chocolate, shaped into festive eggs and decorated for a fun and sweet treat.
Key Ingredients
- 6 tablespoons unsalted butter, softened
- ½ cup creamy peanut butter
- ¼ cup marshmallow cream
- ½ teaspoon vanilla extract
- Pinch of salt
- 2 cups powdered sugar
For Coating and Decoration
- ¾ cup dark chocolate melting wafers
- ¼ cup white chocolate melting wafers
- Green gel food coloring
- Edible candy flowers
Tools Needed
- Mixing bowl
- Electric mixer
- Spatula
- Egg molds
- Microwave safe bowl
- Ziplock bags
- Small brush
Cooking Instructions
Step 1: Make the Filling
Beat butter, peanut butter, marshmallow cream, vanilla, and salt until smooth and creamy.
Step 2: Form the Dough
Gradually add powdered sugar and mix until a soft, moldable dough forms. If too sticky, add a little more sugar.
Step 3: Melt Chocolate
Melt dark chocolate wafers according to package instructions until smooth and glossy.
Step 4: Coat the Molds
Spoon chocolate into egg molds and use a brush to coat the sides evenly. Chill for a few minutes, then repeat with another layer for a sturdy shell.
Step 5: Fill the Eggs
Add peanut butter mixture into each mold, leaving a small space at the top for sealing.
Step 6: Seal with Chocolate
Cover the filling with melted chocolate, smoothing the top to seal completely. Chill until firm, then gently remove from molds.
Step 7: Decorate
Melt white chocolate and place in a small bag, then pipe simple designs or names on top.
Step 8: Add Details
Tint remaining white chocolate with green coloring, attach candy flowers with small dots of chocolate, and pipe leaf details. Allow everything to set.
Why You’ll Love This Recipe
Creamy filling with rich chocolate coating
No baking required, simple and approachable
Perfect for holidays and special occasions
Customizable decorations for creativity
Balanced sweetness with smooth texture
Mistakes to Avoid & Solutions
Filling too soft
Makes shaping difficult.
Solution: Add more powdered sugar until dough holds shape.
Chocolate coating too thin
Can break when removing from mold.
Solution: Apply two layers and chill between each.
Overheating chocolate
Leads to grainy texture.
Solution: Melt slowly in short intervals and stir frequently.
Sticking to molds
Makes removal difficult.
Solution: Chill thoroughly before removing.
Decoration not sticking
Occurs if chocolate sets too quickly.
Solution: Add decorations while coating is slightly soft.
Serving and Pairing Suggestions
Serve chilled for a firmer texture
Pair with coffee or milk
Arrange on decorative trays for events
Add to dessert boxes or gift sets
Display alongside other festive treats
Storage and Reheating Tips
Store in airtight container in refrigerator up to 1 week
Keep in a cool place to prevent melting
Do not microwave as chocolate coating may soften
Freeze up to 1 month for longer storage
Thaw in refrigerator before serving
FAQs
Can I use natural peanut butter?
Yes, but stir well to avoid separation and adjust sugar if needed.
Do I need molds?
No, you can shape by hand into egg forms.
Why is my chocolate dull?
It may have overheated or cooled too quickly.
Can I use milk chocolate instead?
Yes, for a sweeter coating.
How do I make them less sweet?
Use darker chocolate and reduce powdered sugar slightly.
Tips & Tricks
Chill filling before shaping for easier handling
Use a small brush for even chocolate coating
Work in batches to keep chocolate smooth
Keep decorations simple for a clean look
Recipe Variations
Chocolate Peanut Version
Mix mini chocolate chips into the filling for added texture and richness.
Almond Twist
Replace peanut butter with almond butter for a slightly nuttier flavor.
Healthier Option
Use natural peanut butter and reduce powdered sugar slightly for a less sweet version.
Mini Bites
Shape into small bite sized pieces instead of eggs for easy snacking.
Final Thoughts
The spring fair brought together small details that made the day feel full without needing anything complicated. These treats fit naturally into that setting, offering a mix of texture and sweetness that felt both playful and familiar. The process of making them carried a quiet rhythm, from shaping to decorating, that made the experience just as enjoyable as sharing them.
Moments like these often come from simple preparations and shared spaces. Creating something by hand adds a thoughtful touch, turning an ordinary gathering into something more memorable, where even a small dessert can leave a lasting impression.
Creamy Peanut Butter Eggs
Course: DessertDifficulty: Easy12
servings25
minutes10
minutes1
hourSmooth peanut butter filling coated in rich chocolate, shaped into festive eggs and decorated for a fun and sweet treat.
Ingredients
6 tablespoons unsalted butter, softened
½ cup creamy peanut butter
¼ cup marshmallow cream
½ teaspoon vanilla extract
Pinch of salt
2 cups powdered sugar
- For Coating and Decoration
¾ cup dark chocolate melting wafers
¼ cup white chocolate melting wafers
Green gel food coloring
Edible candy flowers
Directions
- Beat butter, peanut butter, marshmallow cream, vanilla, and salt until smooth and creamy.
- Gradually mix in powdered sugar until a soft, moldable dough forms, add more if too sticky.
- Melt dark chocolate wafers until smooth and glossy.
- Coat egg molds with chocolate using a brush, chill, then repeat for a second layer.
- Fill molds with peanut butter mixture, leaving space at the top.
- Cover with melted chocolate to seal, chill until firm, then remove from molds.
- Melt white chocolate, place in a bag, and pipe designs or names on top.
- Color remaining white chocolate green, attach candy flowers, pipe leaves, and let set.