Sourdough White Chocolate Chips Strawberry Bread
The farmer at the weekend market slipped an extra bag into my basket without saying much. “Too ripe to sell tomorrow,” he said with a small shrug. Inside were strawberries, soft and deeply fragrant, the kind that stain your fingers before you even get them home.
By the time I reached my kitchen, the kids had already claimed a handful, leaving behind a mix of perfect pieces and slightly wrinkled ones. Not quite fresh, not quite ready to toss. That in-between stage always feels like an invitation to bake.
I didn’t want to make jam or anything too predictable. Instead, I pulled out my sourdough starter, the one that’s been quietly living in the corner of my fridge, and started thinking about something softer, sweeter. A loaf that feels like breakfast but leans into dessert just enough to feel special.
The first slice came out warm, dotted with creamy white chocolate and little bursts of strawberry. It didn’t last long. Even the quietest kid at the table asked for another piece, which is usually the only review I need.
Short Description
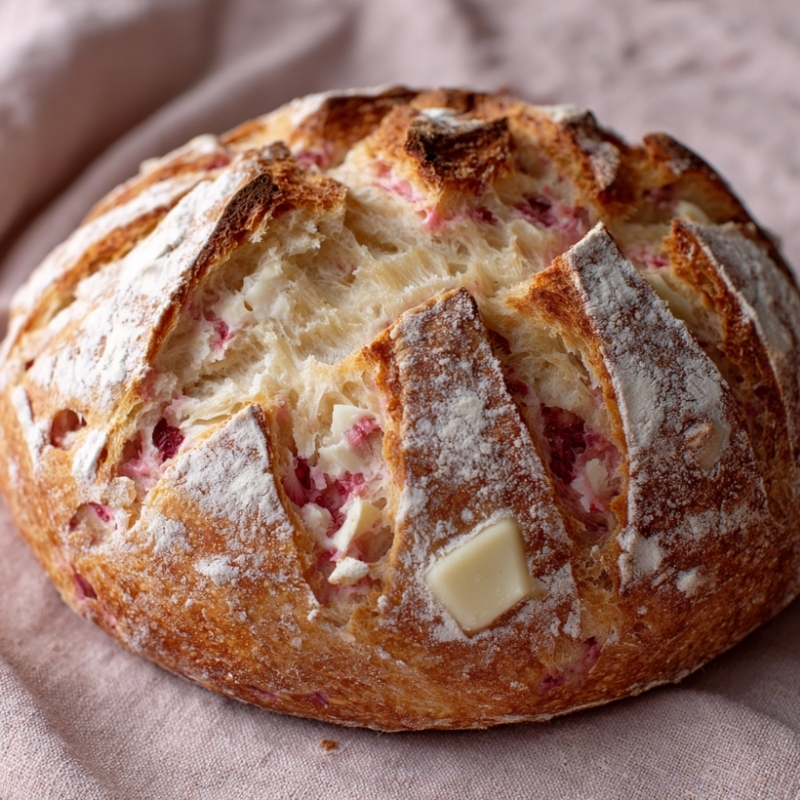
A soft, lightly tangy sourdough bread filled with sweet white chocolate chips and vibrant strawberry flavor, finished with a golden crust and tender crumb.
Key Ingredients
- 500 g bread flour
- 325 g filtered water, room temperature
- 10 g salt
- 100 g active sourdough starter, fed within 12 hours
- 30 g sugar
- 30 g freeze-dried strawberry powder
- 30 g dried strawberries, chopped
- 5 oz white chocolate chips
Tools Needed
- Large mixing bowl
- Bench scraper
- Proofing basket
- Dutch oven
- Parchment paper
- Sharp blade or bread lame
- Wire rack
Cooking Instructions
Step 1: Mix the Dough Base (Shaggy Stage)
In a large bowl, dissolve the sourdough starter in the filtered water, stirring until mostly smooth. Add bread flour, sugar, salt, and freeze-dried strawberry powder. Mix until a shaggy dough forms with no dry flour visible. The dough will feel sticky and uneven, which is expected at this stage.
Step 2: Fold in the Add-Ins
Gently incorporate the chopped dried strawberries and white chocolate chips. Fold carefully to distribute evenly without tearing the dough. If the dough feels too sticky, lightly wet your hands instead of adding more flour.
Step 3: Rest the Dough (Autolyse)
Cover the bowl with a damp cloth and let the dough rest for 30 minutes. This allows the flour to hydrate and makes the dough easier to handle later.
Step 4: Strengthen with Stretch and Folds
Perform 3 to 4 sets of stretch and folds every 30 minutes over 2 hours. Lift one side of the dough, stretch it upward, then fold it over itself. Rotate the bowl and repeat. The dough should gradually become smoother and more elastic.
Step 5: Bulk Fermentation
Let the dough rest at room temperature for 4 to 6 hours until it doubles in size. It should look airy with small bubbles forming. If your kitchen is cool, this may take longer.
Step 6: Shape the Dough
Lightly flour your work surface and gently turn out the dough. Shape it into a round or oval loaf, creating surface tension by pulling the dough toward you. Place it seam-side up into a floured proofing basket.
Step 7: Cold Fermentation
Cover and refrigerate for 12 to 18 hours. This slow fermentation deepens flavor and helps the dough firm up for easier scoring.
Step 8: Preheat the Oven
Place your Dutch oven in the oven and preheat to 450°F (232°C) for at least 30 minutes. A fully heated pot helps create a crisp crust.
Step 9: Score and Bake
Transfer the dough onto parchment paper, then score the top with a sharp blade. Carefully place it into the hot Dutch oven. Cover and bake for 20 minutes, then uncover and bake for another 15 to 20 minutes until golden brown with a crisp crust.
Step 10: Cool Before Slicing
Transfer to a wire rack and let cool completely for at least 1 hour. Cutting too soon can make the crumb gummy.
Why You’ll Love This Recipe
Sweet and Tangy Balance: The sourdough base pairs beautifully with the sweetness of white chocolate and strawberries
Soft Yet Structured Crumb: Tender inside with just enough chew
Naturally Flavorful: Freeze-dried strawberry powder adds real fruit intensity without extra moisture
Make-Ahead Friendly: Overnight fermentation fits easily into a busy schedule
Bakery-Style Results: A golden crust with a rich, layered flavor
Mistakes to Avoid & Solutions
Dense Loaf: Under-fermented dough won’t rise properly
Solution: Wait until the dough visibly doubles and feels airy before shaping
Burnt Chocolate Spots: White chocolate can scorch at high heat
Solution: Keep chips tucked inside the dough and avoid exposing them on the surface
Sticky Dough: High hydration can feel tricky to handle
Solution: Use damp hands during folds instead of adding extra flour
Flat Shape: Weak shaping leads to spreading
Solution: Build surface tension during shaping by gently tightening the dough
Gummy Texture: Cutting too early affects crumb structure
Solution: Let the bread cool fully before slicing
Serving and Pairing Suggestions
Serve slightly warm with a smear of butter
Pair with coffee or a light black tea
Toast slices and top with cream cheese for breakfast
Slice thick and serve as part of a brunch spread
Works well as a lightly sweet dessert bread
Storage and Reheating Tips
Room Temperature: Store in a bread bag or wrapped in cloth for up to 2 days
Refrigerator: Not recommended as it dries out the bread
Freezer: Slice and freeze in airtight bags for up to 2 months
Reheating: Toast slices or warm in the oven at 300°F for 5 to 7 minutes
FAQs
1. Can I use fresh strawberries instead of dried?
Fresh strawberries add too much moisture. Stick with dried and freeze-dried for best texture.
2. What if I don’t have a proofing basket?
You can use a bowl lined with a floured towel.
3. Can I skip the cold fermentation?
Yes, but the flavor will be less developed and the dough softer to handle.
4. Why is my dough not rising?
Your starter may not be active enough. Make sure it’s bubbly and recently fed.
5. Can I reduce the sugar?
Yes, but it helps balance the sourness and enhances the strawberry flavor.
Tips & Tricks
Lightly flour your hands instead of the dough to avoid over-flouring
Use high-quality white chocolate for better melting pockets
Score confidently for better oven spring
Keep the dough covered to prevent drying during rests
Recipe Variations
Chocolate Lover Version
Step 1: Replace half of the white chocolate chips with dark chocolate
Step 2: Fold in as usual during mixing
Berry Mix Version
Step 1: Swap half the dried strawberries with dried raspberries or blueberries
Step 2: Keep the same folding process
Citrus Twist Version
Step 1: Add 1 teaspoon finely grated lemon zest during mixing
Step 2: Continue with the original steps for a brighter flavor
Final Thoughts
This loaf carries a quiet kind of charm. It doesn’t try to compete with elaborate pastries or overly sweet treats, yet it holds attention in its own way. Each slice feels balanced, with soft sweetness and gentle tang woven through the crumb.
It also brings a sense of rhythm back into the kitchen. The resting, folding, and waiting ask for patience, but not perfection. By the time it’s ready, the process feels just as rewarding as the result. And somewhere between that first cut and the last crumb, it turns an ordinary day into something a little more memorable.
Sourdough White Chocolate Chips Strawberry Bread
Course: BreakfastDifficulty: Easy8
servings30
minutes40
minutes12
hoursA soft, lightly tangy sourdough bread filled with sweet white chocolate chips and vibrant strawberry flavor, finished with a golden crust and tender crumb.
Ingredients
500 g bread flour
325 g filtered water, room temperature
10 g salt
100 g active sourdough starter, fed within 12 hours
30 g sugar
30 g freeze-dried strawberry powder
30 g dried strawberries, chopped
5 oz white chocolate chips
Directions
- In a large bowl, dissolve the sourdough starter in the filtered water until mostly smooth. Add bread flour, sugar, salt, and freeze-dried strawberry powder, then mix until a shaggy, sticky dough forms with no dry flour visible.
- Gently fold in the chopped dried strawberries and white chocolate chips until evenly distributed. If the dough feels too sticky, lightly wet your hands instead of adding flour.
- Cover the bowl with a damp cloth and let the dough rest for 30 minutes to hydrate and relax.
- Perform 3 to 4 sets of stretch and folds every 30 minutes over 2 hours, lifting and folding the dough over itself each time. It should gradually become smoother and more elastic.
- Let the dough ferment at room temperature for 4 to 6 hours, or until it doubles in size and shows small air bubbles. Extend the time slightly if your kitchen is cool.
- Turn the dough onto a lightly floured surface and shape it into a round or oval loaf, creating gentle surface tension. Place seam-side up into a floured proofing basket.
- Cover and refrigerate for 12 to 18 hours to develop flavor and firm up the dough.
- Preheat the oven to 450°F (232°C) with a Dutch oven inside for at least 30 minutes.
- Transfer the dough onto parchment paper, score the top, and carefully place it into the hot Dutch oven. Cover and bake for 20 minutes, then uncover and bake for another 15 to 20 minutes until golden brown and crisp.
- Cool on a wire rack for at least 1 hour before slicing to avoid a gummy texture.